
SpringBoot集成RabbitMQ
1.1 创建SpringBoot项目
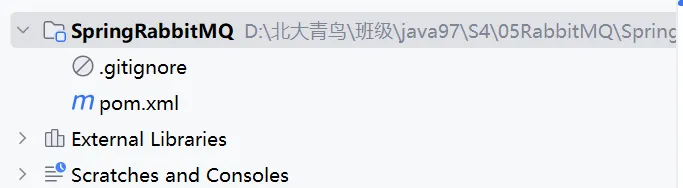
1.1.1创建一个SpringRabbitMQ项目,打包类型为pom
1.1.2添加依赖
<?xml version="1.0" encoding="UTF-8"?>
<project xmlns="http://maven.apache.org/POM/4.0.0"
         xmlns:xsi="http://www.w3.org/2001/XMLSchema-instance"
         xsi:schemaLocation="http://maven.apache.org/POM/4.0.0 http://maven.apache.org/xsd/maven-4.0.0.xsd">
    <modelVersion>4.0.0</modelVersion>

    <groupId>com.syh</groupId>
    <artifactId>SpringRabbitMQ</artifactId>
    <version>1.0-SNAPSHOT</version>
    <modules>
        <module>publisher</module>
    </modules>

    <parent>
        <groupId>org.springframework.boot</groupId>
        <artifactId>spring-boot-starter-parent</artifactId>
        <version>3.2.3</version>
        <relativePath/> <!-- lookup parent from repository -->
    </parent>
    <packaging>pom</packaging>

    <properties>
        <maven.compiler.source>17</maven.compiler.source>
        <maven.compiler.target>17</maven.compiler.target>
        <project.build.sourceEncoding>UTF-8</project.build.sourceEncoding>
    </properties>
    <dependencies>
        <dependency>
            <groupId>org.projectlombok</groupId>
            <artifactId>lombok</artifactId>
        </dependency>
        <dependency>
            <groupId>org.springframework.boot</groupId>
            <artifactId>spring-boot-starter-amqp</artifactId>
        </dependency>
        <dependency>
            <groupId>org.springframework.boot</groupId>
            <artifactId>spring-boot-starter-web</artifactId>
        </dependency>
        <dependency>
            <groupId>org.springframework.boot</groupId>
            <artifactId>spring-boot-starter-test</artifactId>
            <scope>test</scope>
        </dependency>
    </dependencies>

    <build>
        <plugins>
            <plugin>
                <groupId>org.springframework.boot</groupId>
                <artifactId>spring-boot-maven-plugin</artifactId>
            </plugin>
        </plugins>
    </build>

</project>
1.2.3创建子模块publisher
消息的生产者
server:
  port: 8081
spring:
  rabbitmq:
    host: 47.120.37.156
    port: 5672
    username: shan
    password: 123456
    virtual-host: syh
1.2.4创建子模块consumer
消息的消费者
server:
  port: 8082
spring:
  rabbitmq:
    host: 47.120.37.156
    port: 5672
    username: shan
    password: 123456
    virtual-host: syh
1.2.5最终项目结构
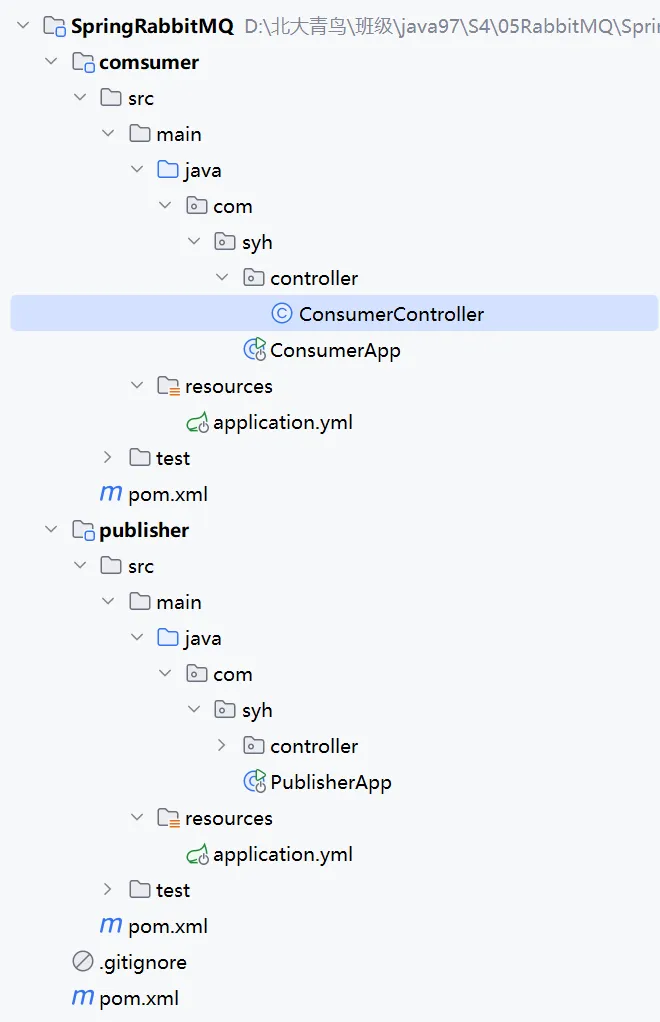
2,简单(Simple)模式

2.1 消费者模块声明队列
package com.syh.config;

import org.springframework.amqp.core.Queue;
import org.springframework.context.annotation.Bean;
import org.springframework.context.annotation.Configuration;

/**
 * @author shan
 * @date 2024/5/19 14:30
 */
@Configuration
public class MQConfig {

    @Bean
    public Queue queue() {
        return new Queue("simple.queue");
    }
}
2.2 在生产者模块模拟发送消息
@RestController
@RequiredArgsConstructor
public class PublisherController {

    private final RabbitTemplate rabbitTemplate;

    @GetMapping("/publish/{message}")
    public String publish(@PathVariable("message") String message) {
        System.out.println("publish message: " + message);
        rabbitTemplate.convertAndSend("simple.queue", message);
        return "success";
    }
}
测试:

查看mq控制台

发送成功
2.3 在消费者模块模拟接受消息
package com.syh.mq.listener;

import org.springframework.amqp.rabbit.annotation.RabbitListener;
import org.springframework.stereotype.Component;

/**
 * @author shan
 * @date 2024/5/19 14:58
 */
@Component
public class MQListener {
    @RabbitListener(queues = "simple.queue")
    public void listenSimpleQueueMessage(String msg) throws InterruptedException {
        System.out.println("spring 消费者接收到消息:【" + msg + "】");
    }
}
测试:

3,工作(Work)模式

需要创建一个队列多个消费者:
,消费完即丢失了。
如果有多个消费者消费同一队列的消息
默认是采取的是公平模式,每人一半消息,不管性能高低,
,设置每个消费者最多取一条消息,处理完即可拿下一条消息。能者多劳(处理快的处理多)
****3.1 创建队列
package com.syh.config;

import org.springframework.amqp.core.Queue;
import org.springframework.context.annotation.Bean;
import org.springframework.context.annotation.Configuration;

/**
 * @author shan
 * @date 2024/5/19 14:30
 */
@Configuration
public class MQConfig {

    @Bean
    public Queue simplerQueue() {
        return new Queue("simple.queue");
    }
    @Bean
    public Queue workQueue1() {
        return new Queue("work.queue");
    }
}
3.2 生产者模拟发送多条消息
@GetMapping("/publish2/{message}")
public String publishMessage(@PathVariable("message") String message) {
System.out.println("publish message: " + message);
for (int i = 0; i < 20; i++) {
rabbitTemplate.convertAndSend("work.queue", message +"_" + i);
}
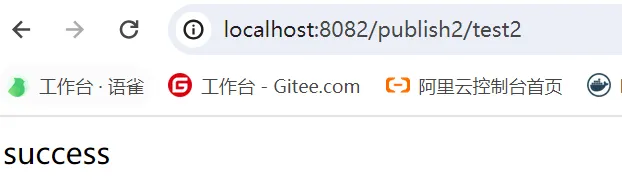
return "success";
}测试
查看

发送成功
3.2 消费者模块模拟接受消息
package com.syh.mq.listener;

import org.springframework.amqp.rabbit.annotation.RabbitListener;
import org.springframework.stereotype.Component;

/**
 * @author shan
 * @date 2024/5/19 14:58
 */
@Component
public class MQListener {
    @RabbitListener(queues = "simple.queue")
    public void listenSimpleQueueMessage(String msg) throws InterruptedException {
        System.out.println("spring 消费者接收到消息:【" + msg + "】");
    }

    @RabbitListener(queues = "work.queue")
    public void listenWorkQueueMessage1(String msg) throws InterruptedException {
        System.out.println("spring 消费者1--接收到消息:【" + msg + "】");
    }
    @RabbitListener(queues = "work.queue")
    public void listenWorkQueueMessage2(String msg) throws InterruptedException {
        System.err.println("spring 消费者2--接收到消息:【" + msg + "】");
    }
}
测试:
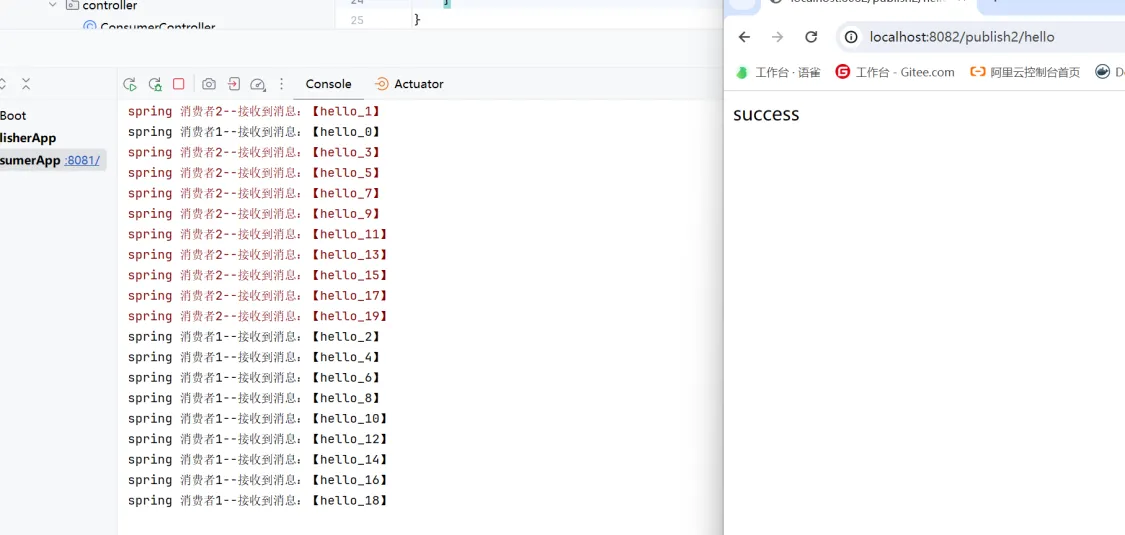
通过效果能看出:
两个消费者各自消费了10个消息
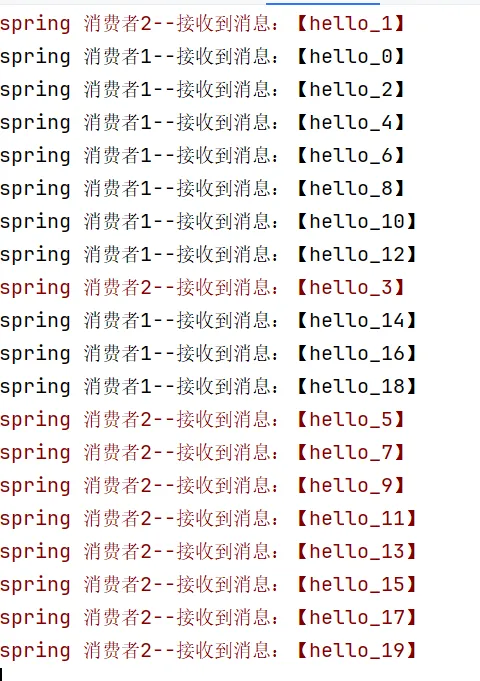
配置消费者最多拿取消息的数量
- 模拟两个消费者处理消息的时长不同
@RabbitListener(queues = "work.queue")
public void listenWorkQueueMessage1(String msg) throws InterruptedException {
    System.out.println("spring 消费者1--接收到消息:【" + msg + "】");
    Thread.sleep(20);
}
@RabbitListener(queues = "work.queue")
public void listenWorkQueueMessage2(String msg) throws InterruptedException {
    System.err.println("spring 消费者2--接收到消息:【" + msg + "】");
    Thread.sleep(200);
}
如果不设置 prefatch
 每个消费者各自处理10条消息
- 设置
server:
port: 8081
spring:
rabbitmq:
host: 47.120.37.156
port: 5672
username: shan
password: 123456
virtual-host: syh
listener:
simple:
prefetch: 1 #设置每次从RabbitMQ接收的消息数量, 每次只能获取一条消息,处理完成才能再次接收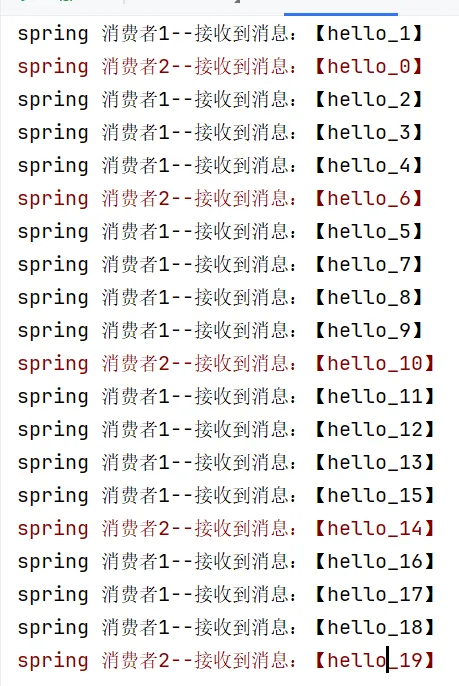 消费者1处理快,处理的数据多
4,发布订阅(模式
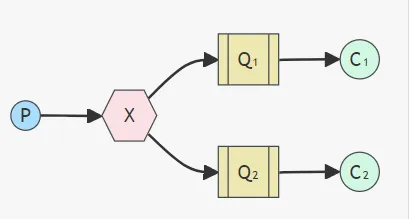
场景:用户下单后,可能会调用多个微服务,多个微服务中都需要获取改订单信息进行处理。
@Bean
public FanoutExchange fanoutExchange(){
    //        ExchangeBuilder builder = ExchangeBuilder.fanoutExchange("exchange.fanout");
//        return builder.build();
    return new FanoutExchange("exchange.fanout");
}
@Bean
public Queue fanoutQueue1() {
    // Queue queue = QueueBuilder.durable("simpler").build();
    return new Queue("fanout.queue1");
}
@Bean
public Queue fanoutQueue2() {
    return new Queue("fanout.queue2");
}
4.1 交换机和队列的绑定
@Bean
public Binding bindingExchangeFanoutQueue1() {
    return BindingBuilder.bind(fanoutQueue1()).to(fanoutExchange());
}
@Bean
public Binding bindingExchangeFanoutQueue2() {
    return BindingBuilder.bind(fanoutQueue2()).to(fanoutExchange());
}
或者
@RabbitListener(bindings = @QueueBinding(
        value = @Queue(name = "fanout.queue1"),
        exchange = @Exchange(name = "exchange.fanout", type = ExchangeTypes.FANOUT)
))
4.2 生产者模拟发送消息
@GetMapping("/publish3/{message}")
public String publish3(@PathVariable("message") String message) {
    System.out.println("publish message: " + message);
    String exchangeName = "exchange.fanout";
    rabbitTemplate.convertAndSend(exchangeName,"", message);
    return "success";
}
测试发送消息
 查看
查看

但是此时看不到消息:
因为交换机与队列此时并没有绑定!
4.3 消费者模拟消费消息
@RabbitListener(bindings = @QueueBinding(
        value = @Queue(name = "fanout.queue1"),
        exchange = @Exchange(name = "exchange.fanout", type = ExchangeTypes.FANOUT)
))
public void listenDirectQueue1(String msg){
    System.out.println("消费者接收到fanout.queue1的消息:【" + msg + "】");
}

@RabbitListener(bindings = @QueueBinding(
        value = @Queue(name = "fanout.queue2"),
        exchange = @Exchange(name = "exchange.fanout", type = ExchangeTypes.FANOUT)
))
public void listenDirectQueue2(String msg){
    System.out.println("消费者接收到fanout.queue2的消息:【" + msg + "】");
}
此时监听的同时 让交换机与队列进行了绑定
测试发送消息
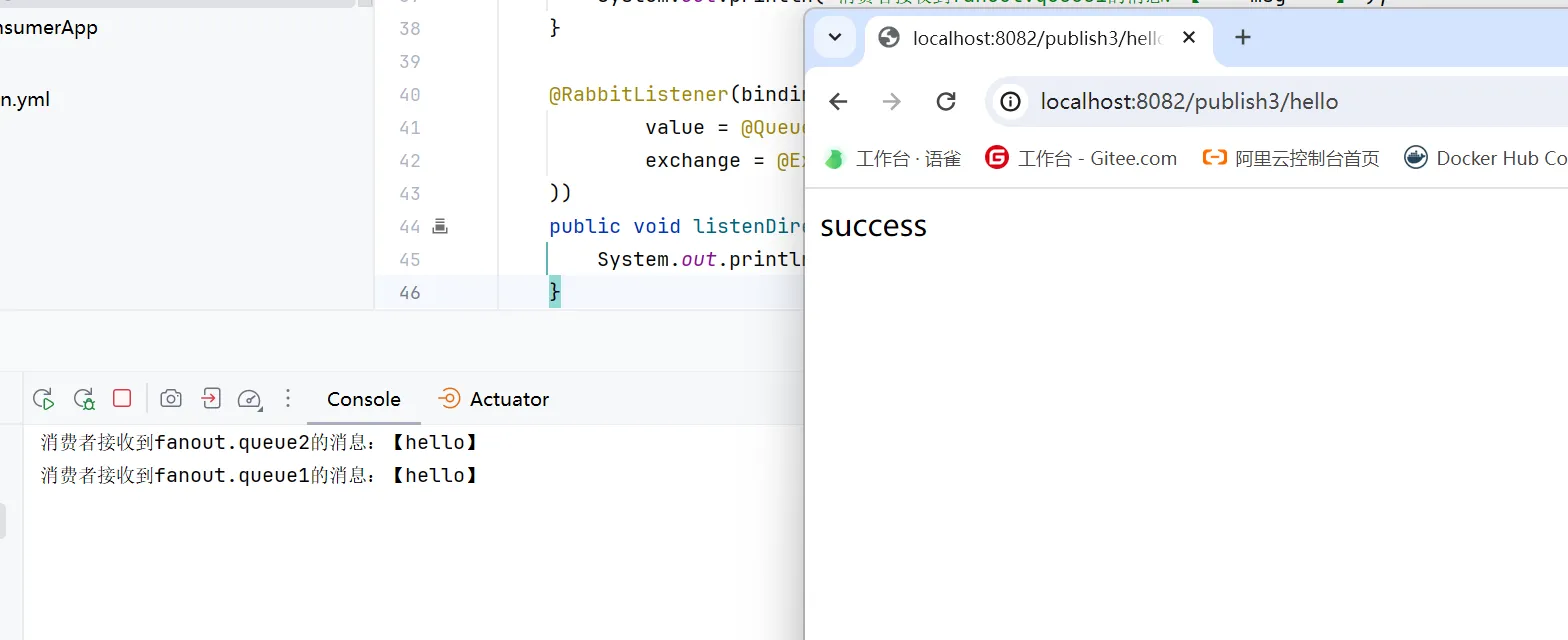
能够接受并消费
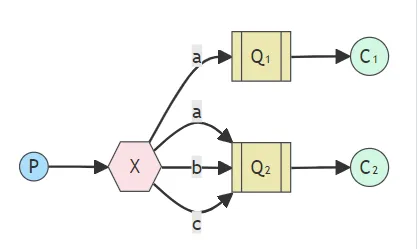
5,路由(Routing)模式
@Bean
public DirectExchange directExchange(){
return new DirectExchange("exchange.direct");
}
@Bean
public Queue directQueue1() {
return new Queue("direct.queue1");
}
@Bean
public Queue directQueue2() {
return new Queue("direct.queue2");
}
@Bean
public Queue directQueue3() {
return new Queue("direct.queue3");
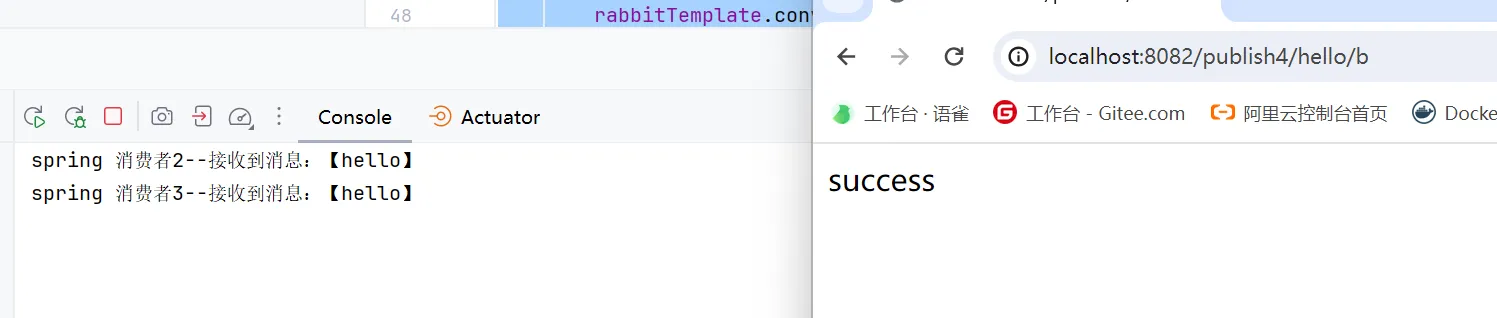
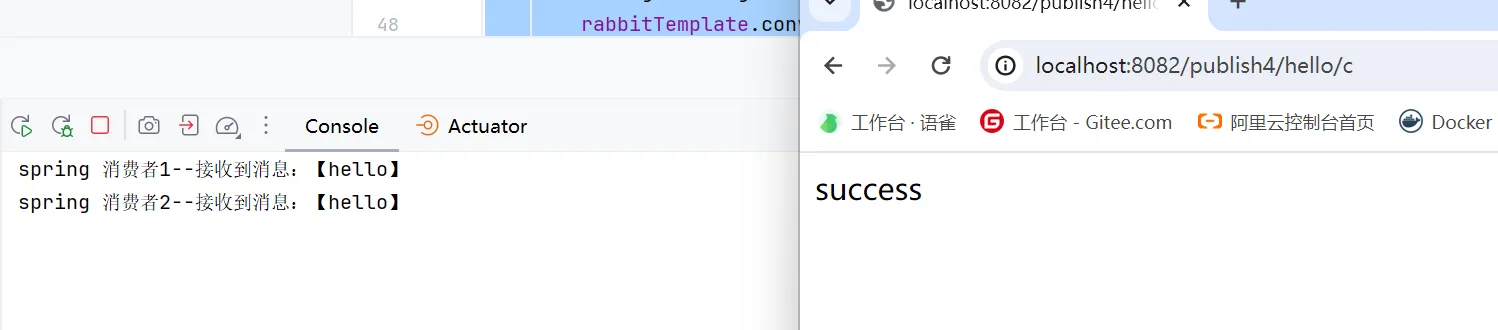
}5.2 生产者模拟发送个消息
@GetMapping("/publish4/{message}/{routeKey}")
public String publish4(@PathVariable("message") String message,
                       @PathVariable("routeKey") String routeKey) {
    System.out.println("publish message: " + message);
    System.out.println("routeKey: " + routeKey);
    String exchangeName = "exchange.direct";
    rabbitTemplate.convertAndSend(exchangeName,routeKey, message);
    return "success";
}
注意:发送消息是带了routingKey
5.3 消费者模拟消费消息
//------------------------------------------
@RabbitListener(bindings = @QueueBinding(
        value = @Queue(name = "direct.queue1"),
        exchange = @Exchange(name = "exchange.direct", type = ExchangeTypes.DIRECT),
        key = {"a","c"}
))
public void listenRabbitListener1(String msg) throws InterruptedException {
    System.out.println("spring 消费者1--接收到消息:【" + msg + "】");
}
@RabbitListener(bindings = @QueueBinding(
        value = @Queue(name = "direct.queue2"),
        exchange = @Exchange(name = "exchange.direct", type = ExchangeTypes.DIRECT),
        key = {"b","c"}
))
public void listenRabbitListener2(String msg) throws InterruptedException {
    System.out.println("spring 消费者2--接收到消息:【" + msg + "】");
}
@RabbitListener(bindings = @QueueBinding(
        value = @Queue(name = "direct.queue3"),
        exchange = @Exchange(name = "exchange.direct", type = ExchangeTypes.DIRECT),
        key = {"a","b"}
))
public void listenRabbitListener3(String msg) throws InterruptedException {
    System.out.println("spring 消费者3--接收到消息:【" + msg + "】");
}
5.4 测试

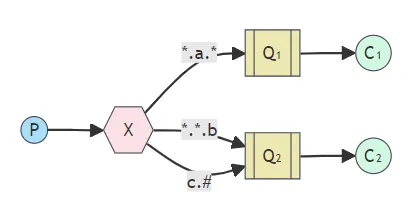
6,主题(Topic)模式

6.1 声明队列和交换机
@Bean
public TopicExchange topicExchange(){
    return new TopicExchange("exchange.topic");
}
@Bean
public Queue topicQueue1() {
    return new Queue("topic.queue1");
}
@Bean
public Queue topicQueue2() {
    return new Queue("topic.queue2");
}
@Bean
public Queue topicQueue3() {
    return new Queue("topic.queue3");
}
6.2 生产者发送消息
@GetMapping("/publish5/{message}/{routeKey}")
public String publish5(@PathVariable("message") String message,
                       @PathVariable("routeKey") String routeKey) {
    System.out.println("publish message: " + message);
    System.out.println("routeKey: " + routeKey);
    String exchangeName = "exchange.topic";
    rabbitTemplate.convertAndSend(exchangeName,routeKey, message);
    return "success";
}
注意:交换机名字
6.3 消费者获取消息
@RabbitListener(
        bindings = @QueueBinding(
                value = @Queue(name = "topic.queue1"),
                exchange = @Exchange(name = "exchange.topic", type = ExchangeTypes.TOPIC),
                key = "*.a.*"
        )
)
public void listenTopicQueue1(String msg) throws InterruptedException {
    System.out.println("spring 消费者1--接收到消息:【" + msg + "】");
}
@RabbitListener(
        bindings = @QueueBinding(
                value = @Queue(name = "topic.queue2"),
                exchange = @Exchange(name = "exchange.topic", type = ExchangeTypes.TOPIC),
                key = "*.*.b"
        )
)
public void listenTopicQueue2(String msg) throws InterruptedException {
    System.out.println("spring 消费者2--接收到消息:【" + msg + "】");
}

@RabbitListener(
        bindings = @QueueBinding(
                value = @Queue(name = "topic.queue3"),
                exchange = @Exchange(name = "exchange.topic", type = ExchangeTypes.TOPIC),
                key = "c.#"
        )
)
public void listenTopicQueue3(String msg) throws InterruptedException {
    System.out.println("spring 消费者3--接收到消息:【" + msg + "】");
}
6.4 测试


7,消息转换器

<dependency>
  <groupId>com.fasterxml.jackson.dataformat</groupId>
  <artifactId>jackson-dataformat-xml</artifactId>
  <version>2.9.10</version>
</dependency>@Bean
public MessageConverter messageConverter() {
return new Jackson2JsonMessageConverter();
}@GetMapping("/publish6/{message}")
public String publish6(@PathVariable("message") String message) {
System.out.println("publish message: " + message);
Map<String, Object> map = new HashMap<>();
map.put("name", "syh");
map.put("age", 22);
map.put("message", message);
rabbitTemplate.convertAndSend("object.queue", map);
return "success";
}